There’s something magical about the sizzle of beef hitting a screaming-hot flat top grill in a stadium parking lot. The aroma wafts through rows of tailgates, drawing hungry fans like a magnet. Smash burgers aren’t just another grilled patty—they’re a textural masterpiece with lacy, crispy edges and a juicy center that captures everything we love about game day cooking. But here’s the secret: achieving that perfect smash isn’t about fancy techniques or secret spices. It all starts with having the right flat top grill designed specifically for the unique demands of tailgating.
Unlike backyard setups where space and power are unlimited, tailgating presents a distinct set of challenges. You’re working on uneven pavement, battling unpredictable winds, racing against the clock, and cooking for a crowd that’s more interested in touchdowns than patience. The ideal tailgating flat top grill becomes your MVP—reliable, powerful, and ready to perform under pressure. Let’s break down everything you need to know to choose the perfect cooking companion for your pre-game ritual.
Top 10 Flat Top Grills for Smash Burgers
Detailed Product Reviews
1. GGC Cast Iron Reversible Grill Griddle,Double Sided Grill Pan Perfect for Gas Grills and Stove Tops, 13 x 8.25 Rectangular Baking Flat and Ribbed Griddle Plate

Overview: The GGC Cast Iron Reversible Grill Griddle offers a compact 13" x 8.25" cooking surface that transitions seamlessly between grill and griddle functions. This dual-sided workhorse features a ribbed surface for searing steaks and chops, while the flat side handles breakfast staples like pancakes and eggs. Designed for both gas grills and stovetops, it’s a versatile addition to any outdoor cooking arsenal or kitchen.
What Makes It Stand Out: The reversible design maximizes utility without consuming storage space. The heavy-duty cast iron construction with matte coating promises durability and superior heat retention. Its integrated side handles provide secure transport, even with oven mitts. The griddle’s ability to maintain consistent temperatures across its surface ensures properly cooked food whether you’re camping or hosting a backyard BBQ.
Value for Money: At $26.99, this griddle sits in the budget-friendly category for cast iron cookware. While it requires initial seasoning (unlike pre-seasoned alternatives), the long-term durability of cast iron makes this a sound investment. Comparable single-purpose griddles often cost more, making the two-in-one design particularly economical for casual grillers.
Strengths and Weaknesses: Strengths include excellent heat distribution, versatile dual-sided cooking, sturdy construction, and an affordable price point. The compact size suits small families or couples. Weaknesses involve the required seasoning process before first use, absence of grease management features, and the 13-inch length may limit cooking capacity for larger gatherings. The manufacturer advises against metal utensils, which may inconvenience some users.
Bottom Line: This GGC griddle excels for those seeking an entry-level cast iron solution without a major investment. Ideal for couples or small families who appreciate versatility and don’t mind the maintenance cast iron demands. While it lacks advanced features, its performance-to-price ratio makes it a solid choice for occasional grillers and camp cooking enthusiasts.
2. Griddle for Gas Grill, Flat Top Cast Iron Griddle Insert for Outdoor Gas 17" x13" Nonstick Coating Cooking Skillet Pan Teppanyaki for Weber Charbroil Camp Chef Charcoal Electric
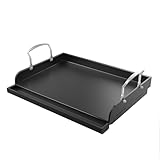
Overview: This 17" x 13" Flat Top Cast Iron Griddle Insert transforms your gas grill into a versatile flat-top cooking station. Engineered for universal compatibility, it fits dozens of popular grill models from Weber, CharBroil, Nexgrill, and other major brands. The expansive cooking surface accommodates full breakfast spreads or multiple burgers simultaneously, making it ideal for entertaining.
What Makes It Stand Out: The exhaustive compatibility list sets this apart—it’s essentially a universal solution for gas grill owners. High-bar sides prevent grease splatter and food spillage while providing a backstop for easy flipping. The integrated handle enables safe repositioning, and the hollowing of side panels ensures proper ventilation and even heating across the surface.
Value for Money: Priced at $69.99, this griddle represents mid-range value. While more expensive than basic cast iron plates, its universal design eliminates the need to buy brand-specific accessories. The nonstick coating metal construction promises easier cleanup than raw cast iron, potentially justifying the premium for those prioritizing convenience over traditional seasoning.
Strengths and Weaknesses: Strengths include broad grill compatibility, generous cooking area, thoughtful grease management, and portability for camping. The handle and high sides enhance safety and usability. Weaknesses involve the ambiguous “nonstick coating metal” description—durability concerns arise with coated surfaces under high heat. The universal fit, while extensive, may not achieve perfect heat distribution on every grill model.
Bottom Line: This griddle insert is perfect for Weber or CharBroil owners wanting to expand their grill’s capabilities without buying a separate flat-top grill. The universal design offers flexibility if you upgrade grills later. While the coating’s longevity remains a question mark, the convenience and compatibility make it a worthwhile investment for frequent entertainers who value easy cleanup.
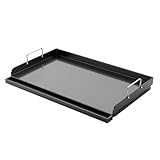
3. Utheer 17" x 13" Nonstick Coating Cooking Griddle for Gas Grill, Universal Griddle Flat Top Plate Insert with Grease Groove and Removable Handles for Charcoal/Gas Grills, Camping, Tailgating, Parties

Overview: The Utheer 17" x 13" Nonstick Griddle delivers a spacious cooking surface with universal compatibility for gas and charcoal grills, camping setups, and tailgating. This griddle plate focuses on user-friendly upgrades like detachable handles and a dedicated grease trough, positioning itself as a premium alternative to basic inserts. The nonstick coating promises effortless food release and simplified cleanup after cooking eggs, pancakes, or stir-fry.
What Makes It Stand Out: Detachable side handles differentiate this model, allowing for compact storage and safer handling when hot. The integrated grease trough effectively captures runoff, preventing dangerous flare-ups and keeping your grill cleaner. Edge polishing prevents scratching during handling, while the thicker material construction resists warping under intense heat—addressing common complaints with lesser griddles.
Value for Money: At $69.99, it matches competitors but offers superior features. The removable handles alone justify the price for those with limited storage. While coated metal may not last as long as raw cast iron, the maintenance-free convenience appeals to casual users unwilling to season traditional griddles regularly.
Strengths and Weaknesses: Strengths include versatile compatibility, smart grease management, removable handles, safety-conscious edge design, and easy cleaning. The nonstick surface works well when properly preheated and oiled. Weaknesses mirror other coated griddles—potential coating degradation over time, especially with metal utensils. The universal fit, while convenient, may leave gaps on some grill models. Instructions require careful preheating and oiling to prevent sticking.
Bottom Line: This Utheer griddle suits outdoor cooking enthusiasts wanting maximum versatility with minimal maintenance. The detachable handles and grease trough make it more practical than basic inserts. While serious grillers might prefer raw cast iron’s longevity, this offers an excellent balance of convenience, safety, and performance for weekend warriors and tailgaters who prioritize easy cleanup.
4. VEVOR Reversible Grill/Griddle, 17x10’’ Pre-Seasoned Cast Iron Griddle, Rectangular Double Burner Griddle Pan, Non-Stick Family Pan Cookware with Handles, Flat Top Plate for BBQ, Gas Grill, Black

Overview: The VEVOR Reversible Grill/Griddle combines traditional cast iron craftsmanship with modern convenience in a 17" x 10" package. This pre-seasoned, double-sided plate arrives ready to cook, eliminating the initial seasoning hurdle that deters many from cast iron. At 3.3mm thick, it provides robust heat retention and even distribution across both its flat and ribbed surfaces, suitable for stovetops, ovens, grills, or campfires.
What Makes It Stand Out: Pre-seasoning at this price point is remarkable—most budget cast iron requires user seasoning. The one-piece construction eliminates weak points, while the reversible design doubles functionality without added cost. Its compatibility across multiple heat sources (including campfires) makes it exceptionally versatile for both home and outdoor use.
Value for Money: At $25.99, this is the most affordable cast iron option reviewed. The pre-seasoning adds significant value, saving time and effort. Comparable reversible griddles typically cost $35-50, making this a bargain. The thickness ensures durability that thinner, cheaper alternatives lack.
Strengths and Weaknesses: Strengths include exceptional price, pre-seasoned surface, versatile compatibility, thick construction, and dual cooking surfaces. The ribbed side creates authentic grill marks while the flat side handles delicate items. Weaknesses include the narrower 10-inch width limiting capacity, absence of handles (though hollow handles are mentioned, they’re less practical than side handles), and cast iron’s weight. The lack of grease management means messy foods require careful handling.
Bottom Line: This VEVOR griddle is ideal for budget-conscious buyers wanting authentic cast iron performance without seasoning hassle. Perfect for small households, campers, and those new to cast iron. While its width restricts large batches, the quality and versatility at this price are unmatched. Choose this for traditional cooking feel over modern coatings—it’s a workhorse that improves with age.
5. grilljoy Professional Griddle Accessories Kit Set with Smash Burger Press - Extra Thick Grill Spatula, Turner, Flipper - 38PCS Flat Top Grill Tools Kit for Outdoor Barbecue Teppanyaki Camping Cooking

Overview: The grilljoy 38-Piece Professional Griddle Accessories Kit equips cooks with every tool needed for flat-top cooking mastery. This comprehensive set includes two long spatulas, tongs, scraper, turner, basting brush, scissors, two basting covers, egg rings, burger press, cleaning brush, squeeze bottles, salt shakers, S-hooks, and a custom carrying bag. Designed for both indoor and outdoor griddles, it covers breakfast through dinner preparations.
What Makes It Stand Out: The sheer completeness sets this apart—most kits include 5-10 pieces, but 38 tools prepare you for any scenario. The inclusion of a burger press and basting covers adds professional flair. Ergonomically designed handles with non-slip grips reduce fatigue during extended cooking sessions. Everything packs into a custom carrying bag, making it tailgate and camping-ready.
Value for Money: At $26.99 for 38 pieces, the per-item cost is under 75 cents, representing exceptional value. Individual purchase of these items would exceed $80. The dishwasher-safe stainless steel construction ensures longevity, while the heavy-duty design withstands high-heat griddle cooking. This kit eliminates the need to piece together accessories gradually.
Strengths and Weaknesses: Strengths include comprehensive tool selection, ergonomic handles, heat-resistant materials, included storage bag, and professional-grade burger press. The variety suits everything from delicate eggs to smash burgers. Weaknesses involve potential quality trade-offs at this price point—some tools may feel lighter duty than standalone professional versions. The abundance of pieces could overwhelm minimalists, and the stainless steel may scratch nonstick griddle surfaces if not used carefully.
Bottom Line: This kit is perfect for griddle newcomers or as a gift for barbecue enthusiasts. It provides immediate functionality without research or multiple purchases. While serious chefs might upgrade individual pieces over time, the kit’s value and completeness are undeniable. Ideal for outdoor events, camping, and home kitchens alike—it’s the most economical way to acquire a full griddle tool set.
6. Blackstone Griddle Cookbook: Smash Burgers, Steaks, and Easy Flat Top Recipes for Outdoor Cooking

Overview: This specialized cookbook targets Blackstone griddle owners seeking to master outdoor flat-top cooking. Focused on smash burgers, steaks, and straightforward recipes, it serves as a culinary guide for transforming your backyard griddle into a versatile cooking station. The book likely offers technique-driven instructions tailored specifically to the high-heat, large-surface nature of griddle cooking.
What Makes It Stand Out: Unlike generic grilling books, this title zeroes in on griddle-specific methods—perfect for the booming flat-top cooking trend. It presumably covers the science behind smash burgers, temperature management across different zones, and timing for achieving restaurant-quality crusts. The recipe curation appears practical for weeknight dinners and weekend gatherings alike, potentially including sauce recipes and topping combinations that complement high-heat searing.
Value for Money: At $15.99, this cookbook sits comfortably in the standard pricing tier for specialty cookbooks. While free online recipes abound, the value lies in curated, tested methods that save you from trial-and-error waste of expensive meats. For novice griddle cooks, it accelerates the learning curve significantly compared to piecing together fragmented YouTube tutorials.
Strengths and Weaknesses: Strengths: Specialized focus eliminates irrelevant content; likely includes troubleshooting tips; portable reference that doesn’t require internet; inspiration for maximizing griddle investment. Weaknesses: May lack photographic step-by-step guidance; recipes could be too basic for experienced cooks; physically limited to griddle applications unlike more versatile outdoor cooking books.
Bottom Line: An worthwhile purchase for new Blackstone owners wanting a dedicated recipe foundation. Experienced cooks might find it redundant, but beginners will appreciate the focused guidance and technique-building approach.
7. Utheer 25" x 16" Nano-Ceramic Nonstick Griddle for Gas & Charcoal Grills – Universal Flat Top with Grease Groove, Reinforced Ridges & High Sidewalls, Perfect for Healthy Cooking, Parties & Camping
Overview: This universal griddle plate transforms standard gas or charcoal grills into professional flat-top cooking stations. Measuring 25" x 16" x 2.6", it features a nano-ceramic coating designed for even heat distribution and non-toxic cooking. The unit includes practical enhancements like a grease trough, detachable handles, and reinforced support ridges for stability during high-heat sessions.
What Makes It Stand Out: The cutting-edge nano-crystalline ceramic coating distinguishes this from traditional steel griddles, offering a chemical-free nonstick surface that withstands high temperatures without releasing toxins. Reinforced support ridges prevent warping—a common failure point in lesser griddles—while the integrated grease management system reduces dangerous flare-ups. Detachable handles provide portability for camping and tailgating scenarios.
Value for Money: Priced at $129.00, this griddle sits in the mid-range category, delivering premium features that justify the cost. Comparable built-in griddle stations cost hundreds more, while cheaper steel alternatives lack the non-toxic coating and structural reinforcements. For health-conscious grillers wanting versatility without investing in a dedicated griddle grill, this offers excellent ROI.
Strengths and Weaknesses: Strengths: Non-toxic ceramic coating ensures safe cooking; superior heat distribution eliminates hot spots; robust construction prevents warping; versatile compatibility; excellent grease management. Weaknesses: Ceramic surface requires careful handling to avoid chipping; premium price may deter casual users; added height could affect lid closure on some grills; heavier than basic steel plates.
Bottom Line: A top-tier upgrade for serious grill enthusiasts prioritizing health and performance. The durable construction and thoughtful design make it worth the investment for frequent outdoor cooks.
8. Cuisinart 6.5" Cast Iron Smashed Burger Press, Round Flat Edge Grill Press for Crispy Smash Burgers, Burger Tool for Grill and Griddle Accessories, for BBQs and Tailgates

Overview: This compact cast iron press delivers the essential tool for creating authentic smashed burgers with crispy, caramelized edges. The 6.5-inch diameter provides focused pressure for thin patties, while the flat edge design ensures maximum surface contact. Built for both indoor skillets and outdoor griddles, it’s a specialized accessory for burger perfectionists.
What Makes It Stand Out: The heavy-duty cast iron construction provides superior thermal mass, maintaining temperature when contacting cold meat—crucial for achieving the Maillard reaction that defines great smash burgers. The flat edge design (rather than ridged) maximizes crust formation across the entire patty surface. Cuisinart’s reputation for quality kitchen tools suggests reliable performance backed by a trusted brand name.
Value for Money: At $24.99, this press offers professional-grade performance at an accessible price point. Cheaper aluminum alternatives lack the thermal retention necessary for proper smashing, while this cast iron model performs like restaurant equipment costing twice as much. For burger enthusiasts, it’s a small investment that dramatically improves results over spatula-smashing methods.
Strengths and Weaknesses: Strengths: Excellent heat retention creates superior crust; durable cast iron lasts generations; compact size allows precise control; versatile for bacon and other pressed foods; easy hand-wash maintenance. Weaknesses: 6.5" size limits simultaneous multi-patty smashing; heavy weight may fatigue some users; requires seasoning like all cast iron; handle can get hot without proper care.
Bottom Line: An indispensable tool for anyone serious about smash burgers. The performance-to-price ratio is outstanding, making it a no-brainer addition to your griddle toolkit despite its single-purpose nature.
9. homenote Griddle Accessories for Blackstone, Commercial Grade 12 Inch Heavy Duty Melting Dome with Round Cast Iron Smash Burger Press Perfect for Flat Top Hibachi Grill Outdoor Indoor
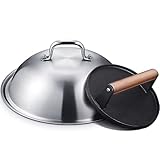
Overview: This two-piece commercial-grade set combines a 12.5-inch stainless steel melting dome with a 7-inch cast iron burger press, delivering professional hibachi-style tools to home cooks. The dome concentrates heat for even cooking and cheese melting, while the press creates perfect smash burgers. Designed for Blackstone and similar flat-top grills, it’s a complete accessory solution.
What Makes It Stand Out: The set addresses two critical griddle techniques simultaneously—smashing and steaming/melting. The 2.5mm-thick 304 stainless steel dome offers exceptional durability and heat resistance, covering multiple patties at once. The 7-inch cast iron press provides a larger surface area than standard presses, while the solid wood handle ensures safe operation. Together, they replicate restaurant kitchen efficiency.
Value for Money: Priced at $27.64 for both tools, this represents exceptional value. Purchasing comparable commercial-grade items separately would cost $40-60. The inclusion of a heavy-duty dome alone justifies the price, essentially making the press a free bonus. For those building their griddle accessory collection, this bundle saves money while ensuring tool compatibility.
Strengths and Weaknesses: Strengths: Professional-grade materials throughout; oversized dome covers more food; cast iron press seasons naturally; two essential tools in one purchase; excellent price point; versatile for steaming vegetables and melting cheese. Weaknesses: Dome storage requires significant space; 7" press may be oversized for single burgers; set might be overkill for occasional griddle users; wooden handle requires oiling to prevent cracking.
Bottom Line: The best value bundle for aspiring griddle masters. Buying these commercial-quality tools separately costs far more, making this an intelligent purchase for dedicated outdoor cooking enthusiasts.
10. Skyflame Universal Stainless Steel Griddle Flat Top Plate with Even Heating Bracing for BBQ Charcoal/Gas Grills, Camping, Tailgating, and Parties 17" x 13"

Overview: This compact stainless steel griddle plate (17" x 13") offers an affordable entry into flat-top grilling for existing BBQ owners. Constructed from restaurant-grade stainless steel with underside cross-bracing, it promotes even heating while preventing warping. The built-in grease well and sidewalls contain food and drippings, making it practical for breakfast through dinner applications.
What Makes It Stand Out: The innovative wavy hollow side panel design enhances airflow and heat distribution, a feature rarely seen in budget griddles. The cross-bracing structure addresses the primary failure mode of thin steel plates—warping under high heat. Its smaller footprint makes it ideal for portable grills, camping trips, and tailgating where larger griddles prove unwieldy while still providing ample cooking space for 4-6 servings.
Value for Money: At $62.99, this represents one of the best price-to-performance ratios in the griddle market. It delivers core functionality—nonstick stainless surface, grease management, even heating—at half the cost of ceramic-coated alternatives. For occasional users or those wanting to test griddle cooking before major investment, it’s a low-risk, high-reward purchase that doesn’t compromise essential features.
Strengths and Weaknesses: Strengths: Extremely affordable entry point; superior warp-resistance design; lightweight portability; effective grease containment; easy stainless steel maintenance; fits most portable grills. Weaknesses: Smaller cooking surface limits large gatherings; stainless steel requires more oil than true nonstick; thinner material cools faster than cast iron; no handles included for hot removal.
Bottom Line: An excellent starter griddle that punches above its weight class. Perfect for campers, tailgaters, and budget-conscious grillers wanting to explore flat-top cooking without major financial commitment.
Why Smash Burgers and Tailgating Are a Perfect Match
The Science Behind the Perfect Smash
Smash burgers rely on the Maillard reaction—that beautiful browning process that occurs when beef proteins meet intense heat above 400°F. When you smash a loosely packed meatball onto a hot surface, you maximize surface contact and create those irresistible crispy edges. For tailgating, this technique is pure gold because it cooks burgers in under two minutes, letting you feed a crowd quickly between tosses and interceptions.
The flat top’s consistent surface eliminates flare-ups from dripping fat, which is crucial when you’re cooking in a crowded parking lot with vehicles and people nearby. Unlike traditional grills with grates, the solid cooking surface captures all those flavorful juices and fats, creating a self-basting environment that keeps your patties moist while the exterior crisps to perfection.
What Sets Smash Burgers Apart from Traditional Grilling
Traditional grilling relies on convective heat and often leaves you with dry, overcooked patties when you’re distracted by the pre-game festivities. Smash burgers thrive on conductive heat transfer—the direct contact between meat and metal. This method requires a surface that can maintain temperature even when you drop cold meat onto it repeatedly. At a tailgate, where you’re cooking multiple batches for a rotating cast of hungry fans, temperature recovery becomes more important than maximum BTU output.
The technique also demands workspace. You’re not just cooking patties; you’re toasting buns, melting cheese, and possibly caramelizing onions on the same surface. This multitasking capability makes flat top grills infinitely more practical than traditional grills for the smash burger method.
Essential Features of Tailgate-Ready Flat Top Grills
Portability vs. Cooking Surface Size
The eternal tailgating dilemma: how much cooking space can you realistically transport and set up? A 22-inch surface might cook 6-8 burgers simultaneously, while a 36-inch model can handle 15-20. But that larger size comes with significant weight and space penalties. Consider your typical crew size and vehicle capacity carefully.
Look for models with removable griddle tops or foldable legs that reduce storage dimensions by 40-50%. The sweet spot for most tailgaters is a 28-inch surface that balances capacity with portability, typically weighing between 75-90 pounds. This size handles a dozen burgers at once while still fitting in an SUV cargo area alongside coolers and chairs.
Heat Output: BTUs and Temperature Recovery
Manufacturers love to boast about BTU ratings, but for smash burgers, temperature recovery matters more than raw power. A 25,000 BTU burner that maintains 500°F after smashing six patties beats a 40,000 BTU burner that drops to 350°F and takes five minutes to recover. Look for grills with multiple independently controlled burners that distribute heat across zones.
The key metric is heat density—BTUs per square inch of cooking surface. Aim for at least 70 BTUs per square inch for effective smash burger cooking. A 28-inch grill with three 12,000 BTU burners (36,000 total BTUs across 615 square inches) provides excellent performance without excessive propane consumption.
Material Matters: Griddle Surface Construction
Cold-rolled steel is the gold standard for smash burger surfaces. It seasons beautifully, develops a naturally non-stick patina, and holds heat exceptionally well. Thickness matters enormously—look for surfaces at least 3/16-inch thick (roughly 5mm). Thinner surfaces heat up faster but lose temperature quickly when you add cold meat.
Avoid stainless steel cooking surfaces for smash burgers. While they’re rust-resistant and easy to clean, they don’t develop the same seasoning layer and typically have lower heat retention. Chrome-plated surfaces offer easier cleanup but can’t handle the aggressive scraping and high heat that smash burgers demand.
Fuel Sources: Making the Right Choice for Parking Lot Cooking
Propane: The King of Convenience
One-pound propane canisters offer ultimate portability but burn out quickly under high heat—often lasting only 1-2 hours of continuous cooking. For a full tailgate, connect your grill to a 20-pound tank using an adapter hose. This setup provides 8-10 hours of cooking time and eliminates mid-game fuel anxiety.
Check your stadium’s propane policies. Some venues restrict tank sizes or require specific safety certifications. Always transport propane tanks upright and never store them in enclosed vehicle compartments. A quality regulator with built-in safety shutoff is non-negotiable for tailgating setups.
Electric Options: When Open Flame Isn’t Allowed
Some stadiums prohibit open flames entirely, making electric flat tops your only option. Modern electric models can reach smash burger temperatures (450-500°F) but require significant power—typically 1,500-1,800 watts. This means you need access to a generator or portable power station with at least 2,000-watt capacity.
Electric grills offer precise temperature control and eliminate fuel transport concerns. However, they struggle with temperature recovery compared to propane models and may trip circuit breakers if you’re sharing power with speakers or TVs. Always test your power setup at home before game day.
Charcoal Flavor: Is It Worth the Trade-off?
Charcoal flat tops exist but present major tailgating challenges. They take 20-30 minutes to reach cooking temperature, require ash disposal, and many stadiums ban charcoal due to fire concerns. While the subtle smoky flavor appeals to purists, the convenience penalty rarely justifies the choice for smash burgers, which rely on pure beef flavor and crust development.
If you must use charcoal, consider a hybrid model that accepts both charcoal and propane. Use propane to get the surface ripping hot quickly, then add a small amount of charcoal for flavor. This approach maximizes flexibility while minimizing setup time.
Size and Capacity Planning for Your Crew
Calculating Cooking Surface Area Per Person
A standard smash burger patty (3-4 ounces) needs roughly 25 square inches of surface area when accounting for smashing space and bun toasting room. For a crew of eight people eating two burgers each, you need to cook 16 patties. A 28-inch grill (615 square inches) handles this in two batches with room for toppings.
Factor in cooking time: each batch takes about 90 seconds to cook, plus 30 seconds for smashing and flipping. With a 28-inch surface, you can feed a dozen people in under 10 minutes of actual cooking time. Larger crews might require sequential cooking or a bigger grill, but remember that massive surfaces cool down slower and use more fuel.
Storage and Transport Dimensions
Measure your vehicle’s cargo space before falling in love with any grill. Many “portable” models still require 3x2 feet of floor space. Look for grills with nesting components—the griddle top should flip upside down over the burners for transport, reducing height by 6-8 inches.
Consider the “tailgate triangle”: the relationship between setup time, cooking capacity, and storage space. A grill that sets up in under 5 minutes but cooks slowly wastes valuable pre-game time. Conversely, a massive grill that cooks for 20 but takes 20 minutes to assemble creates its own problems.
Heat Distribution: The Secret to Even Smashing
Hot Zones and Cold Zones
Even the best flat tops have temperature variations. Professional tailgaters learn to use these zones strategically. The area directly over burners runs 50-75°F hotter than corners. Use this knowledge to your advantage: start patties in the hot zone for the initial smash and crust formation, then move them to cooler areas to finish while you start the next batch.
Quality grills minimize these variations through heat diffusers or burner placement. Look for models with burners that run front-to-back rather than side-to-side, as this creates more consistent lateral heat distribution. Test your grill’s hot spots at home using the bread test—place slices of white bread across the surface and observe browning patterns after 60 seconds.
Recovery Time Between Batches
Recovery time separates premium grills from budget options. After smashing a batch of cold patties, your surface temperature can drop 100-150°F. The best tailgating grills return to 450°F within 60-90 seconds. This speed depends on burner placement, steel thickness, and wind protection.
To maximize recovery, let the surface reheat for 90 seconds between batches. Resist the urge to start cooking immediately. Some pros keep a small cast iron press heating on the side to help the surface rebound faster—placing it on the griddle between batches transfers stored heat back into the surface.
Portability Features That Actually Matter
Weight and Wheel Systems
A fully loaded 28-inch steel griddle can weigh 90+ pounds. Look for models with large, all-terrain wheels (minimum 6-inch diameter) that handle gravel, grass, and cracked pavement. Locking casters are essential—parking lots aren’t level, and a runaway grill full of hot grease is a disaster waiting to happen.
Consider the “lift factor.” You’ll need to lift the grill into your vehicle, possibly alone. Handles positioned at knee height let you use leg strength rather than back muscles. Some models include integrated handles on the griddle top itself, allowing two people to carry components separately.
Fold-and-Go Designs vs. Modular Setup
Fold-and-go grills with integrated stands deploy in under three minutes but sacrifice stability. Modular systems with separate tables and burners offer superior cooking experiences but require 10-15 minutes of assembly. For tailgating, speed often trumps perfection—look for tool-free assembly using heavy-duty latches and folding legs with automatic locks.
The best compromise? A grill with a hinged lid that doubles as a wind guard and prep surface. These designs reduce loose components that get lost in transit while providing multi-functionality that maximizes your limited tailgate real estate.
Transport Security and Locking Mechanisms
Nothing ruins a tailgate like opening your trunk to find your grill has bounced around scratching your vehicle. Quality grills feature integrated locking systems that secure the griddle top to the base during transport. Look for models with rubber feet or pads that prevent metal-on-metal contact.
Consider investing in a custom-fit cover with padding. Not only does it protect your grill, but it also keeps dust and road grime off your cooking surface, reducing cleaning time at the stadium. Some covers include pockets for storing spatulas and oil bottles, keeping everything organized.
Durability in the Elements
Weather-Resistant Materials
Tailgating exposes your grill to conditions backyard equipment never faces: road salt, humidity, temperature swings, and UV radiation. Powder-coated steel frames resist rust better than painted surfaces, but check that the coating is oven-cured rather than air-dried. Oven-cured powder coat withstands 500°F without bubbling or peeling.
Stainless steel components should be 304-grade, not the cheaper 430-grade found on budget models. The difference? 304 contains nickel and chromium that prevent rust even when scratched. Test with a magnet—304 stainless is non-magnetic, while 430 will stick slightly.
Rust Prevention and Maintenance
Your cold-rolled steel cooking surface will rust if not properly maintained. The seasoning layer is your primary defense, but transport exposes unseasoned edges and corners to moisture. After each tailgate, heat the griddle completely dry, then apply a paper-thin layer of high-smoke-point oil (flaxseed or grapeseed) while it’s still warm.
Store your grill with the griddle top removed and stored indoors if possible. At minimum, keep it covered in a dry garage. Many tailgaters keep a dedicated “game day” grill that lives in their vehicle during season, which means monthly seasoning touch-ups are essential to combat condensation and temperature fluctuations.
Mastering Temperature Control in Variable Conditions
Wind Guards and Heat Retention
Wind is the enemy of consistent smash burger cooking. A 10 mph breeze can reduce your surface temperature by 50°F or more. Look for grills with integrated wind guards at least 6 inches high on three sides. These should be removable for cleaning but secure enough to stay in place during cooking.
Some premium models include hinged side shelves that flip up to become wind barriers. This dual-function design saves space while providing protection. For extreme conditions, consider packing a separate portable windscreen—the kind used for backpacking stoves. Position it strategically to block prevailing winds without restricting your access to the cooking surface.
Independent Burner Controls
Multiple burners with independent controls aren’t just for temperature zones—they’re your insurance policy against wind. If a gust cools one side of your grill, you can bump that burner up 10-15% to compensate. Look for knobs with clear detents or clicks that let you make precise adjustments without looking.
The best controls offer low, medium, and high markings that actually correspond to surface temperatures. Test this at home with an infrared thermometer. A “high” setting should maintain 500-550°F on a 70°F day with light wind. If it can’t, you’ll struggle on game day.
The Seasoning Process: Your Grill’s Best Friend
First-Time Seasoning Steps
New cold-rolled steel griddles arrive with a protective coating that must be removed before cooking. Scrub the entire surface with hot soapy water and a scouring pad, then dry completely. Apply a thin layer of flaxseed oil (just enough to make it shine) and heat until it smokes and polymerizes. Repeat this process 3-4 times to build a durable non-stick layer.
Don’t rush this process. A properly seasoned griddle develops a bronze-to-black patina that releases burgers effortlessly and prevents rust. Many tailgaters season their griddles in their home ovens (if they fit) or on a backyard grill before the season starts. This controlled environment produces better results than trying to season in a windy parking lot.
Touch-Up Seasoning at the Tailgate
Between games, your seasoning takes a beating from acidic foods, aggressive scraping, and moisture. Bring a small bottle of grapeseed oil and apply a thin layer after cleaning at the tailgate. Heat the surface for 2-3 minutes until it smokes slightly, then let it cool before covering.
If you notice rust spots forming (common on edges), scrub them with steel wool at home, then re-season just that area. Don’t ignore rust—it spreads quickly and ruins your cooking surface. Some tailgaters keep a dedicated “seasoning kit” in their vehicle with oil, paper towels, and a small scraper for mid-season maintenance.
Cleaning and Maintenance Between Quarters
Scrape, Wipe, Repeat: The Basics
The smash burger technique creates an incredible crust on your patties but also leaves fond (browned bits) stuck to the surface. While still hot, use a sharp metal scraper held at a 45-degree angle to remove debris. Work from back to front, pushing everything into the grease trap.
Follow with a water wipe-down. Pour a small amount of water on the hot surface—it will steam and loosen remaining bits. Immediately scrape again, then wipe with paper towels. This two-step process takes 60 seconds but prevents buildup that ruins future cooks. Never use soap on a seasoned surface—it strips the polymerized oil layer.
Dealing with Grease Management
Smash burgers produce significant grease—up to 2 tablespoons per pound of 80/20 ground beef. Your grill’s grease management system must handle this without overflowing. Look for models with a large-capacity grease cup (minimum 12 ounces) positioned at the front for easy access.
At the tailgate, line your grease cup with heavy-duty aluminum foil for easy cleanup. Empty it after every 5 pounds of beef cooked to prevent overflow. Some pros keep a dedicated “grease jar” with a tight-sealing lid to transport hot grease safely for disposal at home. Never pour grease on the ground—it attracts pests and creates slip hazards.
Post-Game Deep Cleaning
After the game, your grill likely sits in your vehicle for hours before you can clean it properly. This delay causes grease to congeal and harden. Bring a spray bottle with water and a few drops of dish soap. While the grill is still warm (not hot), spray the cooking surface and scrape again. This prevents grease from setting up like concrete.
Once home, do a proper deep clean. Remove the griddle top and scrub the underside and edges where grease splatters accumulate. Check burner ports for clogs using a paper clip or wire brush. Clean the grease trap completely, as rancid grease ruins the next tailgate’s flavors.
Safety Considerations for Crowded Parking Lots
Stability on Uneven Surfaces
Parking lots are never level. Your grill must handle a 5-degree tilt without tipping. Test this at home using wooden shims under the legs. The grill should feel stable when you press down on a front corner. If it rocks, you’ll struggle with grease drainage and risk spills.
Look for adjustable legs or feet that screw in and out to level the cooking surface. Some tailgaters carry a few squares of plywood to create a stable platform on gravel or grass. Never place your grill on plastic folding tables—they melt, and the height is wrong for comfortable smashing.
Grease Fire Prevention
Smash burgers cooked at proper temperatures rarely cause grease fires, but accidents happen. Keep a metal lid or cookie sheet nearby to smother flames. Never use water on a grease fire—it explodes. Your grill should have a bottom pan that catches dripping grease, preventing it from reaching the burners.
Keep a fire extinguisher rated for Class B fires (flammable liquids) in your tailgate kit. Check the pressure gauge monthly during season. Some stadium security may question it, but most allow small extinguishers when they see your cooking setup. Better to have it and not need it.
Proper Ventilation and Carbon Monoxide Awareness
Propane grills produce carbon monoxide, especially when heating up or cooling down. Never cook inside a tent or enclosed canopy, even with the sides open. Position your grill at the edge of your tailgate space, downwind from seating areas. If you feel a headache coming on, move away immediately—CO is odorless and deadly.
Electric grills eliminate this concern but still produce smoke from rendered fat. Be mindful of neighboring tailgaters. A small fan positioned to blow smoke away from crowds (and toward the open lot) keeps you popular with the fans around you.
Budgeting for Your Tailgate Setup
Entry-Level vs. Premium Features
You can find flat top grills for under $200, but they typically use thinner steel, have weaker burners, and lack proper grease management. These models work for occasional use but struggle with the demands of weekly tailgating. Expect to replace them every 1-2 seasons.
Mid-range options ($300-$500) offer 3/16-inch steel, multiple burners, and decent portability. This is the sweet spot for most dedicated tailgaters. Premium models ($600+) add features like electronic ignition, built-in wind guards, and tool storage, but the cooking performance difference is marginal. You’re paying for convenience and durability.
Long-Term Value Considerations
Calculate cost per use. A $400 grill used for 10 games per season over five years costs $8 per tailgate. Cheaper models that need replacement every year actually cost more long-term. Factor in propane costs (about $3-5 per game) and accessories ($50-100 for quality spatulas, scrapers, and oil bottles).
Consider resale value. Quality flat top grills from reputable brands retain 40-60% of their value on secondary markets. Budget models have virtually no resale value. Keep your original packaging for off-season storage—it protects the grill and increases resale appeal if you upgrade.
Must-Have Accessories for Smash Burger Success
Spatulas and Scrapers
You need two spatulas: a sharp, flexible metal turner for flipping and a heavy-duty scraper for cleaning. The turner should have a beveled edge thin enough to slide under crispy patties without breaking the crust. Look for a 6-inch blade with a slight flex—stiff spatulas can’t navigate the curve of a smash burger.
The scraper should be solid steel, not flexible plastic. A 4-inch wide blade with a comfortable handle lets you apply serious pressure to remove stuck-on bits. Some tailgaters modify putty knives from hardware stores—cheap, effective, and replaceable if lost in the parking lot chaos.
Smash Tools and Presses
The smash itself requires a heavy, flat press. Cast iron works best, weighing 2-3 pounds. Wrap it in aluminum foil for easy cleanup. Some pros use a second smaller griddle or cast iron pan as their press—dual-purpose tools save space.
Parchment paper squares (4x4 inches) prevent the press from sticking to the meat. Pre-cut a stack at home and store them in a plastic bag. Don’t use wax paper—it melts and ruins your seasoning. A small spray bottle of water helps release the press if it sticks.
Wind Guards and Covers
Aftermarket wind guards made from sheet metal can be fabricated at home for under $20. Measure your grill’s perimeter and create three panels that bolt to the sides. This customization beats factory guards that are often too short or poorly positioned.
A quality cover protects your investment from road grime and weather. Look for water-resistant polyester with a soft inner lining that won’t scratch your seasoning. The cover should fit snugly but come off easily with cold fingers on a frosty morning game.
Setup and Breakdown: Time Management Strategies
Practice Runs at Home
Never debut a new grill at the stadium. Do at least two practice runs in your driveway, timing every step from unloading to first burger. Identify bottlenecks: Are the legs hard to lock? Is the propane connection awkward? Does the wind guard rattle loose?
Film yourself setting it up. You’ll spot inefficiencies you don’t notice in the moment. The goal is a sub-5-minute setup and sub-3-minute breakdown. This leaves more time for eating and socializing. Practice your cleaning routine too—muscle memory helps when you’re tired post-game.
Organizing Your Tailgate Kit
Create a dedicated “grill box” with everything needed: spatulas, oil, paper towels, scraper, spray bottle, and propane adapter. Use a plastic tote with a locking lid that stays in your vehicle all season. This prevents the “where’s the spatula?” scramble that delays cooking.
Pack a separate “food box” with pre-portioned meat, pre-sliced cheese, and pre-toasted buns (briefly toasted at home, then wrapped in foil). The less prep you do at the tailgate, the faster you cook. Label everything clearly—tailgating with friends means many hands, and clear labels prevent mistakes.
Frequently Asked Questions
How hot should my flat top grill get for proper smash burgers?
Your surface needs to maintain 450-500°F for optimal smash burger creation. Use an infrared thermometer to check the temperature before adding meat. If you’re smashing and not getting an immediate, aggressive sizzle, your surface isn’t hot enough. Let it preheat for 10-15 minutes on high, then adjust to medium-high for cooking.
Can I use a regular flat top grill, or do I need one specifically designed for tailgating?
While backyard flat top grills work in a pinch, tailgate-specific models offer critical features like better portability, wind resistance, and compact storage. Regular grills often have bulky side shelves and weak wheels that struggle in parking lots. If you tailgate more than three times per season, a dedicated portable model is worth the investment.
What’s the best way to transport a greasy griddle top without making a mess?
After cleaning and while still warm, wipe the surface with a thin layer of oil and cover with heavy-duty aluminum foil. Secure the foil around the edges. Transport the griddle top upside-down over the burner assembly if your design allows. This prevents grease from the drip pan from contacting the cooking surface and keeps everything contained.
How do I prevent my burgers from sticking to the griddle?
A properly seasoned surface is key. Ensure your griddle has a dark, polymerized oil coating. Bring meat to near room temperature before cooking (not fully room temp for food safety, but not ice-cold). Use a thin layer of oil on the surface before adding patties, and make sure your press is hot before smashing. Sticking usually indicates inadequate seasoning or insufficient surface temperature.
What should I do if my grill won’t reach high temperatures on a cold game day?
Cold ambient temperatures and wind drastically affect performance. Block wind with your vehicle or a portable barrier. Preheat longer—up to 20 minutes. Keep the lid closed (if your model has one) during preheating. Consider a grill blanket or welding blanket draped over the griddle (not covering controls) to retain heat. If using propane, ensure your tank is full—low pressure in cold weather reduces output.
How many burgers can I realistically cook per hour on a portable flat top?
On a 28-inch surface, you can cook 12 burgers every 4 minutes once up to temperature, translating to roughly 150-180 burgers per hour in ideal conditions. Realistically, accounting for loading, smashing, and serving, plan on 80-100 burgers per hour. For larger events, recruit a helper to manage toppings and assembly while you focus on cooking.
Are electric flat top grills viable for tailgating smash burgers?
Yes, but with caveats. You need a 2,000+ watt generator or power station, which adds cost and weight. Electric models heat slower and recover slower than propane. However, they’re allowed where open flames are prohibited and offer precise temperature control. For occasional tailgaters in restricted venues, they’re practical. For frequent tailgaters, propane remains superior.
How do I handle grease disposal responsibly at the tailgate?
Never pour grease on pavement or in stadium trash cans. Let grease cool slightly, then pour into a sealable metal or glass container. Coffee cans work perfectly. Transport it home and dispose with regular trash once solidified. Some stadiums have grease recycling—ask parking attendants. Always keep grease away from children and pets.
What’s the ideal ground beef fat ratio for smash burgers on a flat top?
80/20 ground chuck is the sweet spot. The 20% fat content renders quickly, creating the crispy edges and juicy interior that define smash burgers. Leaner blends (90/10) dry out and don’t develop proper crust. Fattier blends (70/30) cause excessive flare-ups and grease pooling. Ask your butcher to coarse-grind chuck specifically for smashing.
How do I season my griddle at the tailgate if I forgot to do it at home?
You can do emergency seasoning, but it’s not ideal. Clean the surface completely, apply a whisper-thin layer of high-smoke-point oil, and heat until smoking. Repeat 2-3 times. This takes 30-40 minutes and uses significant propane. The seasoning will be weak and may flake. For best results, always season at home where you can control temperature and ventilation. Keep your griddle seasoned throughout the season to avoid this situation.