Imagine hosting a dinner party where every dish reaches the table at its perfect serving temperature—crispy roasted vegetables still crackling, sauces glossy and hot, plates gently warmed for that restaurant-quality experience. This isn’t the stuff of professional kitchens anymore. As we move into 2026, built-in warming drawers have evolved from a luxury splurge to a strategic kitchen essential that solves one of home cooking’s most persistent challenges: timing.
The modern warming drawer does far more than simply keep food warm. It’s a versatile tool that proofs bread, slow-cooks tender proteins, dehydrates herbs, and even warms towels for a spa-like touch. With kitchen design trending toward seamless, handleless aesthetics and integrated appliance suites, choosing the right warming drawer requires understanding nuanced features that separate premium performers from basic heat boxes. This comprehensive guide walks you through everything you need to know to make an informed decision—without brand bias or marketing fluff.
Top 10 Built-in Warming Drawers for Seamless Kitchen Integration
Detailed Product Reviews
1. KoolMore 30 in. Built-in Residential Warming Drawer with Three Compartments in Stainless-Steel (KM-RWD-30SS)

Overview: The KoolMore KM-RWD-30SS brings commercial-grade warming capabilities to residential kitchens. This 30-inch built-in warming drawer features three compartments and premium stainless steel construction, making it ideal for dinner parties and feast preparations. With user-friendly digital controls and precise thermostatic temperature management, it maintains dishes at optimal serving temperatures without continuing the cooking process.
What Makes It Stand Out: Digital controls set this unit apart from mechanical alternatives, offering effortless temperature adjustments with clear displays. The spacious interior accommodates various dish sizes across three compartments, while energy-efficient performance keeps electricity costs reasonable. The thermostatic control ensures precise temperature maintenance, crucial for keeping different foods at their ideal warmth levels without drying out.
Value for Money: At $960, this warming drawer sits in the premium residential category. While significantly more expensive than basic models, it offers features approaching commercial quality. For serious home entertainers who frequently host large gatherings, the investment pays dividends in convenience and food quality. Compared to commercial units costing $1,500+, it represents reasonable value for residential use.
Strengths and Weaknesses: Pros include precise digital controls, energy efficiency, spacious three-compartment design, and premium stainless steel construction. Cons are the high price point for occasional users, installation requirements as a built-in unit, and temperature range limited compared to commercial alternatives. The residential-focused design may lack the durability needed for daily heavy use.
Bottom Line: Perfect for avid home entertainers seeking professional-grade warming capabilities. If you regularly host dinner parties or holiday feasts, this drawer delivers exceptional performance. For casual users, more affordable options suffice.
2. VEVOR Commercial Electric Drawer Warmer, Single-Drawer Stainless Steel Food Warmer, Built-in Installation Warming Drawer Cabinet, 85°F–185°F Wide Temperature Range, for Restaurant, Hotel & Bakery

Overview: VEVOR’s commercial warming drawer delivers professional food-holding capabilities at an accessible price point. Designed for built-in installation in restaurants, hotels, and bakeries, this single-drawer unit maintains consistent heat from 85°F to 185°F. The stainless steel construction ensures durability in busy commercial environments, while the included full-size pan provides immediate functionality.
What Makes It Stand Out: The adjustable humidity vent is a standout feature, allowing chefs to control moisture levels—open for crisp foods, closed for moist dishes. The wide temperature range accommodates everything from bread proofing to hot food holding. Commercial-grade stainless steel construction withstands constant use, and the removable pan design simplifies cleaning during busy service periods.
Value for Money: At $542, this warming drawer significantly undercuts comparable commercial units while delivering essential professional features. The inclusion of a full-size pan adds immediate value, and the durable construction ensures longevity. For small to medium commercial operations or serious home chefs, it offers exceptional ROI compared to units costing nearly double.
Strengths and Weaknesses: Pros include the innovative humidity control, commercial durability, included accessories, easy cleaning, and wide temperature range. Cons are mechanical rather than digital controls, single-drawer limitation for high-volume needs, and the lower temperature ceiling compared to some commercial models. The brand’s commercial focus may mean less residential-friendly support.
Bottom Line: An excellent choice for commercial kitchens needing reliable food warming without premium pricing. The humidity control feature makes it particularly valuable for bakeries and restaurants serving varied menus. Small catering operations will find it especially cost-effective.
3. KoolMore One-Drawer Commercial Free Standing Warming Drawer in Stainless-Steel, UL and NSF Listed (KM-WD-M1)

Overview: The KoolMore KM-WD-M1 is a commercial-grade warming drawer that combines certifications with robust performance. This free-standing unit offers temperatures from 80°F to 220°F, making it versatile for various holding and proofing applications. UL and NSF listings ensure it meets strict commercial safety and sanitation standards, essential for professional kitchens.
What Makes It Stand Out: Certifications differentiate this unit—UL and NSF listings are mandatory for many commercial installations. The high 220°F temperature ceiling exceeds most competitors, useful for holding hot foods safely. Superior heat retention comes from drawer gaskets and fiberglass insulation, while humidity vents prevent moisture buildup. LED indicators provide at-a-glance operation status.
Value for Money: Priced at $985, this drawer competes with premium commercial units. The certifications alone justify the cost for businesses requiring compliant equipment. Free-standing design eliminates installation costs, adding value. For commercial operators, the durability and compliance features deliver strong long-term value despite the higher initial investment.
Strengths and Weaknesses: Pros include UL/NSF certifications, excellent heat retention, wide temperature range, free-standing flexibility, and LED indicators. Cons are the premium price, mechanical controls lacking digital precision, and single-drawer capacity limitations for high-volume operations. The commercial focus makes it over-specified for residential use.
Bottom Line: Ideal for commercial kitchens requiring certified equipment. Restaurants, catering companies, and foodservice operations needing compliant warming solutions will find this unit worth every dollar. Home users should consider more affordable residential options.
4. yuxiangBBQ Outdoor Kitchen Single Drawer Stainless Steel BBQ Enlarger -30" W x 10" H x 23" D Enclosed Built-in Drawer Flush Mount for Outdoor Kitchens & BBQ Islands

Overview: This yuxiangBBQ drawer provides weather-resistant storage for outdoor kitchens, not warming capabilities. Measuring 30"W x 10"H x 23"D, it’s designed for built-in installation in BBQ islands. The fully enclosed box design protects contents from elements, while soft-closing tracks ensure smooth operation. High-grade stainless steel construction with chrome-plated zinc alloy handles offers durability in outdoor environments.
What Makes It Stand Out: The weatherproof enclosed design distinguishes it from standard indoor drawers, protecting utensils and supplies from moisture and pests. Soft-closing tracks prevent slamming and reduce wear in outdoor settings. The included shelf divider creates two storage zones, enhancing organization. Self-rimming flush mount installation provides a clean, integrated look for custom outdoor kitchens.
Value for Money: At $119, this drawer offers affordable outdoor storage compared to premium brands costing $200+. The stainless steel construction and weather-resistant features deliver excellent value for DIY outdoor kitchen builders. While basic in function, the quality materials and thoughtful design exceed expectations for the price point.
Strengths and Weaknesses: Pros include weatherproof enclosed design, soft-closing mechanism, stainless steel durability, shelf divider, and attractive pricing. Cons are the lesser-known brand, limited depth for larger items, and lack of warming function (important distinction). Installation requires precise cutout measurements.
Bottom Line: Perfect for outdoor kitchen enthusiasts needing secure, weatherproof storage. If you’re building a BBQ island and want durable, affordable drawer storage, this unit delivers. Just remember—it’s for storage only, not food warming.
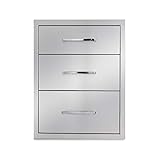
5. yuxiangBBQ Outdoor Kitchen Drawers Stainless Steel 3-Drawer BBQ Drawer 18" W x 21" H x 23" D Enclosed Built-in Drawer Flush Mount for Outdoor Kitchens & BBQ Islands

Overview: This three-drawer unit from yuxiangBBQ offers organized storage solutions for outdoor kitchens, distinct from warming drawers. Measuring 18"W x 21"H x 23"D, it features three compartments (large, medium, small) for versatile storage of BBQ tools, utensils, and supplies. The fully enclosed stainless steel construction protects contents from weather, while silent ball-bearing slides ensure smooth, quiet operation.
What Makes It Stand Out: Triple-compartment organization maximizes storage efficiency in compact outdoor spaces. Silent sliding rails prevent the jarring noise common with outdoor cabinetry. The brushed stainless steel finish resists fingerprints and maintains appearance. The company’s promise of 24-hour customer service support provides peace of mind for buyers concerned about long shipping and potential issues.
Value for Money: At $174, three drawers of this quality represent exceptional value. Comparable outdoor storage systems from established brands often exceed $300. The thoughtful design features—silent slides, weatherproofing, and size variety—deliver functionality that justifies the modest investment for outdoor kitchen builders on a budget.
Strengths and Weaknesses: Pros include three-tier organization, silent operation, durable stainless steel, attractive brushed finish, and responsive customer service. Cons are the smaller 18-inch width limiting storage capacity, complexity of installing three drawers level, and lack of warming functionality. The brand’s relative obscurity may concern some buyers despite service promises.
Bottom Line: Excellent for outdoor chefs wanting organized, weatherproof storage. The three-drawer design keeps BBQ essentials neatly separated and accessible. For the price, it’s hard to beat for DIY outdoor kitchen projects requiring multiple storage compartments.
6. yuxiangBBQ Outdoor Kitchen Drawers Stainless Steel 3-Drawer BBQ Drawer 16" W x 21" H x 23" D Enclosed Built-in Drawer Flush Mount for Outdoor Kitchens & BBQ Islands
Overview: The yuxiangBBQ Outdoor Kitchen Drawers deliver a 16"W x 21"H x 23"D stainless steel storage solution with three tiered compartments for outdoor cooking spaces. Designed for flush-mount installation requiring a 14"W x 19"H cutout, this unit organizes grilling tools, accessories, and supplies while integrating seamlessly into BBQ islands. The construction emphasizes durability and weather resistance for year-round outdoor use.
What Makes It Stand Out: Silent ball-bearing rails on all three drawers deliver exceptionally smooth, quiet operation—a rarity in outdoor hardware where grinding and sticking are common. The graduated drawer sizes (large, medium, small) offer superior organization compared to uniform compartments. Advanced brushed-finish processing enhances both corrosion resistance and visual appeal, while the manufacturer provides maintenance manuals upon request, demonstrating unusual customer care.
Value for Money: Priced at $157.99, this unit positions itself 30-40% below comparable stainless steel drawer systems without sacrificing core functionality. The inclusion of premium silent rails and tiered storage at this price point creates compelling value, though the unspecified steel gauge suggests some cost-saving measures.
Strengths and Weaknesses: Strengths include whisper-quiet sliding mechanism, intelligent storage configuration, proactive customer service with 24-hour response commitment, and included maintenance guidance. Weaknesses involve demanding cutout precision, absent weight capacity specifications, and the manufacturer’s explicit warning about potential shipping delays and damage requiring customer patience.
Bottom Line: This drawer system excels for budget-minded DIYers prioritizing smooth operation and organization. The silent rails justify the purchase alone, but professional installation is advisable given exacting dimensional requirements. Despite shipping caveats, the responsive customer service mitigates risk effectively.
Why Built-In Warming Drawers Are Revolutionizing Modern Kitchens
The Evolution from Luxury to Essential
Ten years ago, warming drawers occupied the “nice-to-have” category, often installed as afterthoughts in high-end renovations. Today’s kitchen design philosophy treats them as workflow multipliers. The shift stems from how we actually live: multi-generational households eating at different times, the rise of meal prepping, and the blurring lines between casual and formal entertaining. A warming drawer becomes your culinary assistant, holding finished components at precise temperatures while you perfect that reduction sauce or wait for your partner to get home.
How Warming Drawers Enhance Your Culinary Workflow
Think of your warming drawer as a time machine for food. It doesn’t just maintain temperature—it pauses the cooking process at the ideal moment. Sear a steak to medium-rare, rest it properly, then hold it at 130°F while you plate sides. Bread dough proofs consistently at 85°F with controlled humidity. That casserole finishes its carryover cooking gently, never drying out. The strategic placement—typically under a wall oven or cooktop—creates a ergonomic triangle that reduces steps and mental load during busy meal prep.
Understanding the Core Functionality of Premium Warming Drawers
Temperature Precision and Range Capabilities
The difference between a mediocre warming drawer and an exceptional one lives in its temperature stability. Premium models maintain set points within ±2°F, crucial for food safety and quality. Look for units offering a broad spectrum: 80-90°F for proofing, 120-140°F for plate warming, 160-200°F for holding cooked foods. Some advanced units reach 250°F for slow-cooking, effectively functioning as a secondary oven. The key specification is “temperature accuracy” rather than just “temperature range.”
Humidity Control Systems Explained
Moisture management separates the pros from the amateurs. Basic models blast dry heat, turning crispy skin soggy and fresh bread crusts chewy. Advanced warming drawers offer adjustable humidity vents or even active moisture injection. This matters more than you’d think: holding roasted chicken at 165°F with 30% humidity keeps skin crisp while meat stays juicy. For bread proofing, 80% humidity prevents crust formation. When evaluating options, prioritize models with independent humidity controls, not just on/off moisture settings.
Capacity Considerations for Different Household Sizes
Warming drawers typically range from 24 to 30 inches wide, but interior volume varies dramatically. A 30-inch model might hold six standard dinner plates, while a 24-inch unit manages four. Consider your actual use cases: do you entertain with multiple courses? Do you batch-cook for a family of five? Measure your largest serving platters and compare to interior dimensions. Don’t forget vertical clearance—some models accommodate tall Dutch ovens, others barely fit a casserole dish. The sweet spot for most households is a 27-inch unit with adjustable rack positions.
Design Integration: Making Your Warming Drawer Invisible
Panel-Ready vs. Standard Stainless Options
The seamless kitchen aesthetic demands panel-ready appliances that accept custom cabinet fronts. These units mount flush with surrounding cabinetry, hiding hinges and controls for a monolithic look. However, they cost 20-30% more and require precise cabinet fabrication. Standard stainless models with pro-style handles can also integrate beautifully if you match the handle style to your other appliances. The secret is consistency—mixing handle profiles breaks the visual flow. For 2026, anticipate more “invisible control” designs where touch panels illuminate through the cabinet panel when activated.
Placement Strategies for Ergonomic Workflow
The golden rule: place your warming drawer where you naturally pause during cooking. Underneath a wall oven creates a convenient transfer zone—pull out a roasted pan and slide it directly into the warming drawer. Installing under an induction cooktop works beautifully, though you’ll need strict clearance specifications. Avoid placing warming drawers in islands unless you have a dedicated prep sink nearby; the walk from range to island introduces unnecessary steps. Height matters too: the drawer should open at waist level, not requiring you to bend excessively when holding hot items.
Matching Your Kitchen’s Aesthetic Language
Your warming drawer should speak the same design language as its neighbors. In minimalist kitchens, look for units with hidden vents and no visible branding. For transitional spaces, consider models with optional tubular or bar handles. Pro-style kitchens benefit from robust stainless with heavy-duty glides. The interior finish matters too—some offer blue enamel that photographs beautifully for social media, while others use stainless for durability. In 2026, expect more manufacturers offering custom color interiors as a design statement.
Installation Requirements You Must Know Before Buying
Electrical Specifications and Circuit Requirements
Most warming drawers require a dedicated 15-amp, 120-volt circuit, but larger units or those with rapid heat functions may need 20 amps. The critical detail is location: you need junction box access within three feet of the installation site. Don’t assume you can tap into the oven’s circuit—many codes prohibit this. For kitchen islands, you’ll need to run conduit under the floor or through base cabinets. Plan for a 4-inch service gap behind the unit for electrical connections, and always verify if the model uses a hardwired connection or a plug-in cord.
Cabinetry Modifications and Cutout Dimensions
Warming drawers demand precise cutouts, typically within 1/16-inch tolerance. You’ll need a base cabinet at least 24 inches deep, with reinforced sides to support 75-100 pounds. The cabinet floor must be level—any tilt affects drawer glide performance and heat distribution. Pay attention to “flush fit” vs. “overlay fit” specifications; flush models require cabinet front modifications that most DIYers can’t handle. For retrofits, check if your existing cabinet has a false drawer front that can convert, or if you’ll need a full replacement cabinet.
Ventilation Clearances for Safe Operation
Despite being “built-in,” warming drawers need breathing room. Most require 1/4-inch clearance on each side and 1-inch at the rear. Under-cooktop installations demand a non-combustible barrier and specific air gaps—usually 2 inches minimum. The toe-kick area must remain open or have ventilation grilles; blocking this causes overheating and voids warranties. If installing in a cabinet run with a dishwasher, separate them by at least one cabinet width to prevent heat and moisture interference.
Advanced Features That Define 2026 Models
Smart Home Integration and App Control
The next generation of warming drawers connects to your home ecosystem, but not all integrations are equal. Look for Wi-Fi connectivity that offers remote preheating and temperature monitoring, not just on/off control. The most useful app features include recipe-based presets (“Keep Pizza Crispy” at 170°F with low humidity) and notifications when the drawer reaches target temp. Be wary of Bluetooth-only models—they require you to be in the kitchen anyway. True smart integration means compatibility with voice assistants and the ability to create automated scenes: “Dinner Party Mode” could warm plates, then switch to holding temperature as guests arrive.
Sensor Technology for Food-Safe Temperatures
Infrared sensors now monitor the actual food surface temperature, not just the drawer air temperature. This prevents the dangerous zone where food sits in the “danger zone” (40-140°F) for too long. Some units feature probe compatibility, letting you monitor internal meat temperatures while holding. The best systems automatically adjust heat output based on food mass—adding a cold roast triggers a boost phase to recover temperature quickly. This sensor feedback loop is what separates 2026 premium models from older units that simply cycle heating elements on a timer.
Multi-Zone Heating Capabilities
Revolutionary new designs offer divided compartments with independent temperature control. Imagine keeping dinner rolls warm at 140°F on one side while proofing dough at 85°F on the other. These zones use separate heating elements and sensors, essentially giving you two appliances in one footprint. The dividers are removable for full-width capacity when needed. This feature particularly shines during holidays—hold gravy at 165°F in a small zone while keeping a turkey at 145°F in the larger area.
Energy Efficiency and Sustainability Considerations
Understanding Energy Star Ratings for Warming Drawers
As of 2026, Energy Star certification for warming drawers measures standby power consumption and temperature recovery efficiency. A certified unit uses less than 0.5 kWh per day in typical use—about $20 annually. The rating also considers insulation effectiveness; poor insulation forces the element to cycle more frequently. Check the yellow Energy Guide label for estimated annual cost, but read the fine print: manufacturers test at 150°F holding temperature, which may not match your usage pattern.
Insulation Technology That Reduces Power Consumption
Premium warming drawers use multi-layer insulation with aerogel or vacuum panels, similar to high-end thermoses. This lets them maintain temperature with heating elements active only 10-15% of the time. The benefit extends beyond energy savings—it means quieter operation and cooler adjacent cabinetry. When evaluating, ask about “R-value” or “thermal resistance.” A value above R-10 indicates excellent insulation. Some models even feature “eco mode” that leverages insulation mass to coast at lower power draw once target temperature is reached.
Eco-Friendly Materials in Modern Construction
Sustainable manufacturing now influences warming drawer design. Look for units with recycled stainless steel content (some reach 80% recycled material) and PFOA-free non-stick interior coatings. Packaging has also evolved—2026 models ship in molded pulp instead of foam. The most progressive manufacturers offer take-back programs for old units, ensuring responsible recycling of electronic components. While these features don’t affect performance, they align with kitchen sustainability goals and often correlate with overall build quality.
Safety Features That Protect Your Family
Automatic Shutoff Systems
The best warming drawers include multi-level shutoff protection. A timer-based shutoff prevents accidental overnight operation—typically 4-12 hour limits. Overheat protection cuts power if internal temperatures exceed safe limits, usually 250°F. Some advanced units feature motion sensors that shut off if the drawer remains open too long, preventing heat damage to surrounding cabinets. For households with memory lapses, look for models that beep periodically when active, serving as a gentle reminder.
Child Lock Mechanisms
Physical lock-and-key systems have given way to digital child locks that disable control panels. The most effective designs require a three-second button hold to activate/deactivate, preventing curious toddlers from accidentally turning on the unit. Some integrate with smart home systems, sending alerts when the lock is engaged or disengaged. If you have young children, verify the lock also prevents drawer opening when engaged—some only lock controls, not the drawer itself.
Cool-Touch Exterior Technology
Triple-pane glass and advanced insulation keep exterior surfaces below 110°F even at maximum internal temperature. This protects against burns and allows installation under wooden countertops without heat damage. Test this in showrooms by running your hand along the front after the unit has been operating for 30 minutes. Quality models feel warm but not hot. This technology also prevents “heat bleed” that can warm adjacent refrigerator contents, a common issue in tight installations.
Maintenance and Longevity Best Practices
Daily Cleaning Routines
Wipe down the interior after each use with a damp microfiber cloth—never abrasive cleaners that damage non-stick coatings. For stuck-on food, place a damp cloth inside and run at 150°F for 10 minutes to steam-clean. Remove and wash racks weekly in warm soapy water; dry thoroughly to prevent rust. The door seal deserves attention—vacuum crumbs monthly and wipe with mild detergent. A compromised seal reduces efficiency by up to 30%.
Preventing Moisture Buildup and Odors
Moisture management prevents that stale, locker-room smell. Always leave the drawer ajar for an hour after use to air out. If your model has a humidity vent, leave it open when storing the unit empty. For persistent odors, place a shallow dish of baking soda inside overnight (unheated). Some premium models include a “dry cycle” that runs the element at low temperature with the vent open, actively evaporating residual moisture. Run this monthly if you use the drawer frequently.
When to Call a Professional for Servicing
Unusual noises—clicking, buzzing, or fan whine—signal element or control board issues requiring professional diagnosis. If the drawer won’t maintain temperature within 5°F of set point, the sensor may be failing. Electrical issues like tripped breakers or flickering control panels demand immediate professional attention. Most manufacturers recommend a five-year service check to inspect wiring and recalibrate sensors. Budget $150-250 for this service, which extends lifespan from the typical 10-15 years toward 20 years.
Budget Planning: What to Expect at Different Price Points
Entry-Level vs. Premium Feature Sets
Budget warming drawers ($800-1,200) offer basic temperature control (usually 90-200°F) and simple on/off operation. They hold temperature adequately but lack humidity control and precise sensors. Mid-range ($1,200-2,000) introduces digital controls, better insulation, and some smart features. Premium units ($2,000-3,500) deliver sensor-based accuracy, multi-zone capability, and robust construction. The jump from mid-range to premium buys you consistency and longevity, not just features. For most users, the sweet spot is $1,500-1,800, where you get core premium features without unnecessary bells and whistles.
Hidden Installation Costs to Factor In
The purchase price rarely tells the full story. Budget $200-400 for electrical work if you need a new circuit. Cabinet modifications can run $300-800 depending on complexity. Panel-ready models require a custom cabinet front ($150-300). Don’t forget the cost of a licensed installer—$150-250 for proper integration. If retrofitting, you may need to relocate plumbing or ductwork inside the cabinet, adding $500+. Always add 20% to your appliance budget for these ancillary costs.
Warranty Coverage That Actually Matters
Standard warranties cover 1-2 years parts and labor, but premium models offer 5-year coverage on electronic controls and limited lifetime on stainless components. The critical fine print: does the warranty require professional installation? Many void coverage if self-installed. Look for in-home service rather than mail-in repairs—a warming drawer is too heavy and complex for DIY fixes. Some manufacturers offer extended warranties covering accidental damage, worthwhile if you have children. Compare deductibles and response times; a warranty is only as good as the service network backing it.
Common Mistakes to Avoid During Selection and Installation
Underestimating Your True Capacity Needs
Buyers frequently choose based on cabinet space rather than actual usage, ending with a drawer that can’t hold a half-sheet pan. Map out your largest serving pieces and measure them. Account for rack spacing—if you plan to stack items, you need at least 6 inches between racks. Remember that capacity ratings (e.g., “holds 6 plates”) assume standard 10-inch plates; your 12-inch charger plates won’t fit. When in doubt, size up. A slightly larger drawer rarely causes regret, while an undersized one becomes a daily frustration.
Ignoring Proximity to Other Appliances
Installing a warming drawer next to a refrigerator forces the fridge compressor to work harder, increasing energy consumption and shortening its lifespan. The same applies to dishwashers—heat and moisture from the warming drawer can interfere with drying cycles. Maintain at least one cabinet width (18 inches) between heat-generating and cooling appliances. Also consider traffic flow: placing a warming drawer in a main prep area creates congestion when family members open it during cooking.
Overlooking Future-Proofing for Technology Upgrades
That Wi-Fi module that seems gimmicky today becomes essential when you upgrade your smart home hub tomorrow. Choose warming drawers with firmware update capability—some 2026 models update automatically via Wi-Fi, ensuring compatibility with new protocols. Verify the control board isn’t proprietary; industry-standard components mean easier repairs in 10 years. Consider power requirements too: while 120V is standard now, some high-performance models offer dual-voltage capability, future-proofing against electrical system upgrades.
The Future of Warming Drawers: Trends Beyond 2026
AI-Powered Temperature Management
Emerging technology uses machine learning to recognize what you’re warming and optimize settings automatically. Place a covered casserole inside, and sensors detect moisture levels and mass, adjusting temperature and humidity accordingly. These systems learn your preferences over time—always proof bread at 82°F for 90 minutes? The drawer will suggest this when it detects dough-like conditions. While still nascent, this AI integration will become standard by 2027, making manual controls largely obsolete.
Integration with Meal Planning Ecosystems
Next-generation warming drawers will sync with meal kit subscriptions and recipe apps, automatically preheating when your delivery arrives. Imagine your drawer receiving a signal from your smart oven: “Roast will be done in 15 minutes,” prompting it to warm plates to 140°F just in time. This ecosystem approach transforms the warming drawer from reactive to proactive, eliminating the “oh right, I forgot to preheat” moment that plagues current usage.
Sustainable Manufacturing Innovations
The push toward circular economy principles is reshaping production. Modular designs allow you to replace heating elements or control boards without discarding the entire unit. Some manufacturers are experimenting with bio-based plastics for interior components and geothermal-inspired heat pumps instead of resistive elements, slashing energy use by 60%. While these technologies remain premium today, they’ll democratize rapidly, much like induction cooktops did in the 2010s.
How to Evaluate Warming Drawers Without Brand Bias
Reading Between the Lines of Specification Sheets
Manufacturers use marketing terms that obscure real performance. “Rapid preheat” might mean reaching 140°F in 10 minutes, but how long to recover after opening the door? Look for “temperature recovery time” specifications—under 3 minutes indicates robust heating elements. “Even heat distribution” should quantify as ±5°F variance across the interior. Be skeptical of wattage claims; a well-insulated 500-watt unit outperforms a poorly insulated 800-watt model. Always request the technical service manual, which contains unbiased performance data not shown in consumer brochures.
What Professional Chefs Prioritize in Testing
Commercial kitchen wisdom translates directly to home use. Chefs test warming drawers by loading them with cold, heavy cast iron and timing temperature recovery—this reveals real-world performance under stress. They check door seal integrity by sliding a dollar bill around the perimeter; if it pulls out easily, the seal is weak. They also listen: quality units operate silently except for a faint click when cycling. Loud fans or humming indicate cheap components. The drawer glide should feel smooth with a satisfying close, not flimsy or rattly.
Red Flags in Product Descriptions
Beware of vague claims like “gourmet results” without technical explanation. Specificity signals quality: “maintains 150°F ±2°F for 4 hours” is credible; “keeps food warm perfectly” is not. Avoid models with exposed heating elements at the bottom—they’re harder to clean and prone to damage. Be cautious of drawers with fewer than three rack positions; this limits versatility. Finally, check the control panel layout: if it requires more than three button presses for common tasks, the user experience will frustrate you daily.
Frequently Asked Questions
What can you actually use a warming drawer for beyond keeping food warm?
Modern warming drawers function as bread proofers, slow cookers, plate warmers, dough risers, and even yogurt makers. Some models dehydrate fruits at low temperatures or melt chocolate without scorching. The key is precise low-temperature control—anything that benefits from gentle, consistent heat between 80-200°F becomes possible.
What’s the difference between a warming drawer and a microwave drawer?
Warming drawers use conductive heat to maintain temperature without continuing to cook food, while microwave drawers use radiation to actively heat items quickly. You can’t proof bread or hold a sauce for hours in a microwave without ruining it. Conversely, a warming drawer can’t reheat cold food efficiently. They’re complementary, not interchangeable.
How much clearance do I need around a built-in warming drawer?
Plan for 1/4-inch side clearance, 1-inch rear clearance for ventilation, and a minimum 2-inch gap if installing under a cooktop. The toe-kick area must remain unobstructed. Always check the installation manual—some premium models require less clearance due to better insulation, but never assume zero clearance is acceptable.
Can I install a warming drawer under a cooktop?
Yes, but only with specific models approved for this configuration. You need a non-combustible insulating barrier and strict adherence to manufacturer-specified air gaps. Induction cooktops pair better than gas due to lower ambient heat. Never install under a gas cooktop with high BTU output unless explicitly approved—the warranty will be void, and it’s a fire hazard.
What’s the ideal temperature for keeping dinner plates warm?
140-150°F is optimal. Lower temperatures won’t effectively warm plates, while higher temps can make them too hot to handle and may damage delicate glazes. Most warming drawers have a dedicated “plate warming” preset at 140°F. Run empty plates for 10-15 minutes before serving—any longer risks thermal shock when you add room-temperature food.
Are warming drawers energy efficient?
Yes, remarkably so. A typical warming drawer uses 400-600 watts when active, but cycles on only 10-15% of the time due to insulation. Daily use costs roughly $0.05-0.10, far less than reheating in an oven. Energy Star certified models use even less, with advanced insulation reducing standby consumption to under 5 watts.
How long can food safely stay in a warming drawer?
Follow the 2-hour rule for most foods. While warming drawers maintain safe temperatures above 140°F, quality degrades over time. Moist foods can stay 2-4 hours without significant texture loss; crispy items should be held no more than 45 minutes even with humidity control. For extended holding (up to 8 hours), use a covered container with some liquid and maintain 165°F.
Can I proof bread in any warming drawer?
Not effectively. You need a model that maintains 80-90°F with high humidity (70-80%). Many basic warming drawers start at 100°F, which kills yeast. Look for a dedicated “proof” setting and humidity control. Without humidity, dough forms a skin that prevents rising. Some bakers place a cup of hot water inside basic drawers to create steam, but results are inconsistent.
What’s the lifespan of a premium warming drawer?
With proper maintenance, 15-20 years. The heating element typically fails first, usually after 10-12 years of heavy use. Control boards last 12-15 years. Quality glide mechanisms should function smoothly for the unit’s lifetime. Signs of impending failure: temperature swings greater than 5°F, unusual noises, or doors that don’t seal properly. Annual professional servicing can extend lifespan significantly.
Do I need a dedicated electrical circuit?
Almost always yes. While a warming drawer draws less power than most appliances, electrical codes require dedicated circuits for built-in heating appliances to prevent overload. Sharing a circuit with a coffee maker or toaster oven can trip breakers. Plan for a 15-amp, 120-volt circuit minimum. Some high-capacity models require 20-amp circuits—verify before roughing in electrical.